Showing posts with label sewing. Show all posts

Friday, May 1, 2020

More Face Masks

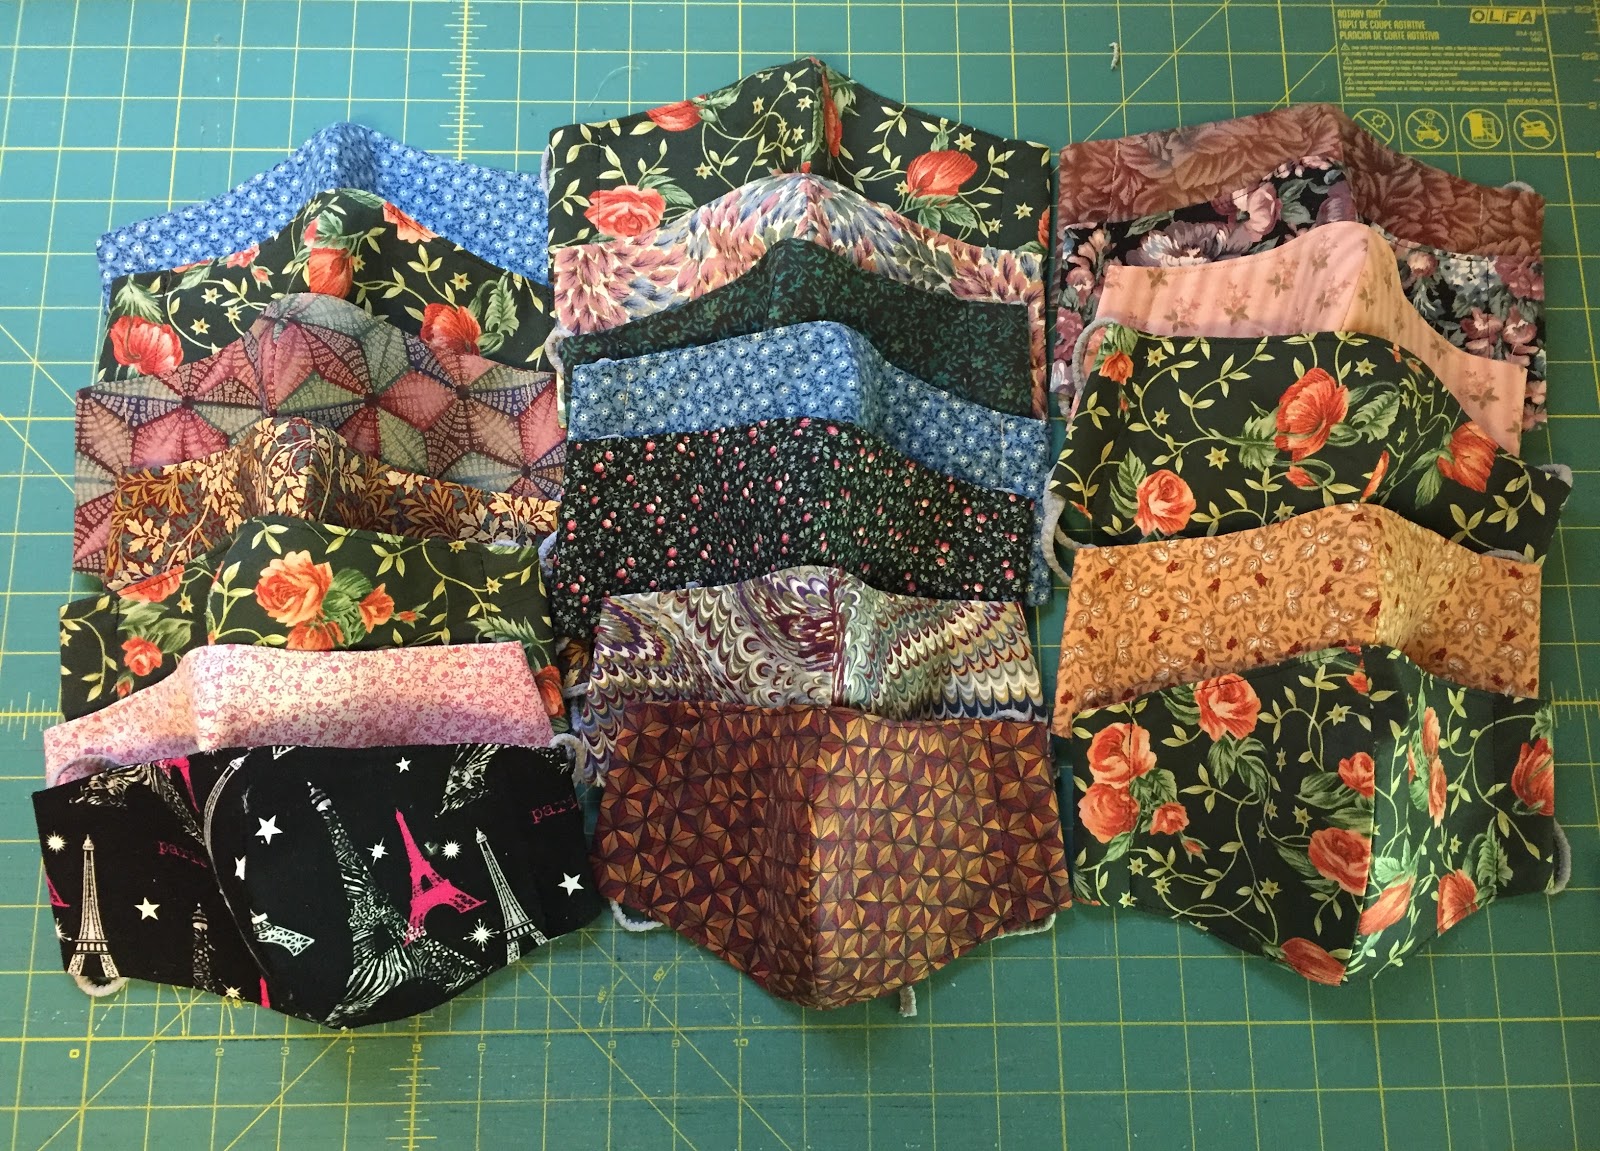
I've made a few more face masks.  A few of these went to friends but most of them went to the custodial workers at UAMS (via a friend who asked for them). All of these were made using the  Olson Mask pattern.  


Friday, April 17, 2020

Face Masks

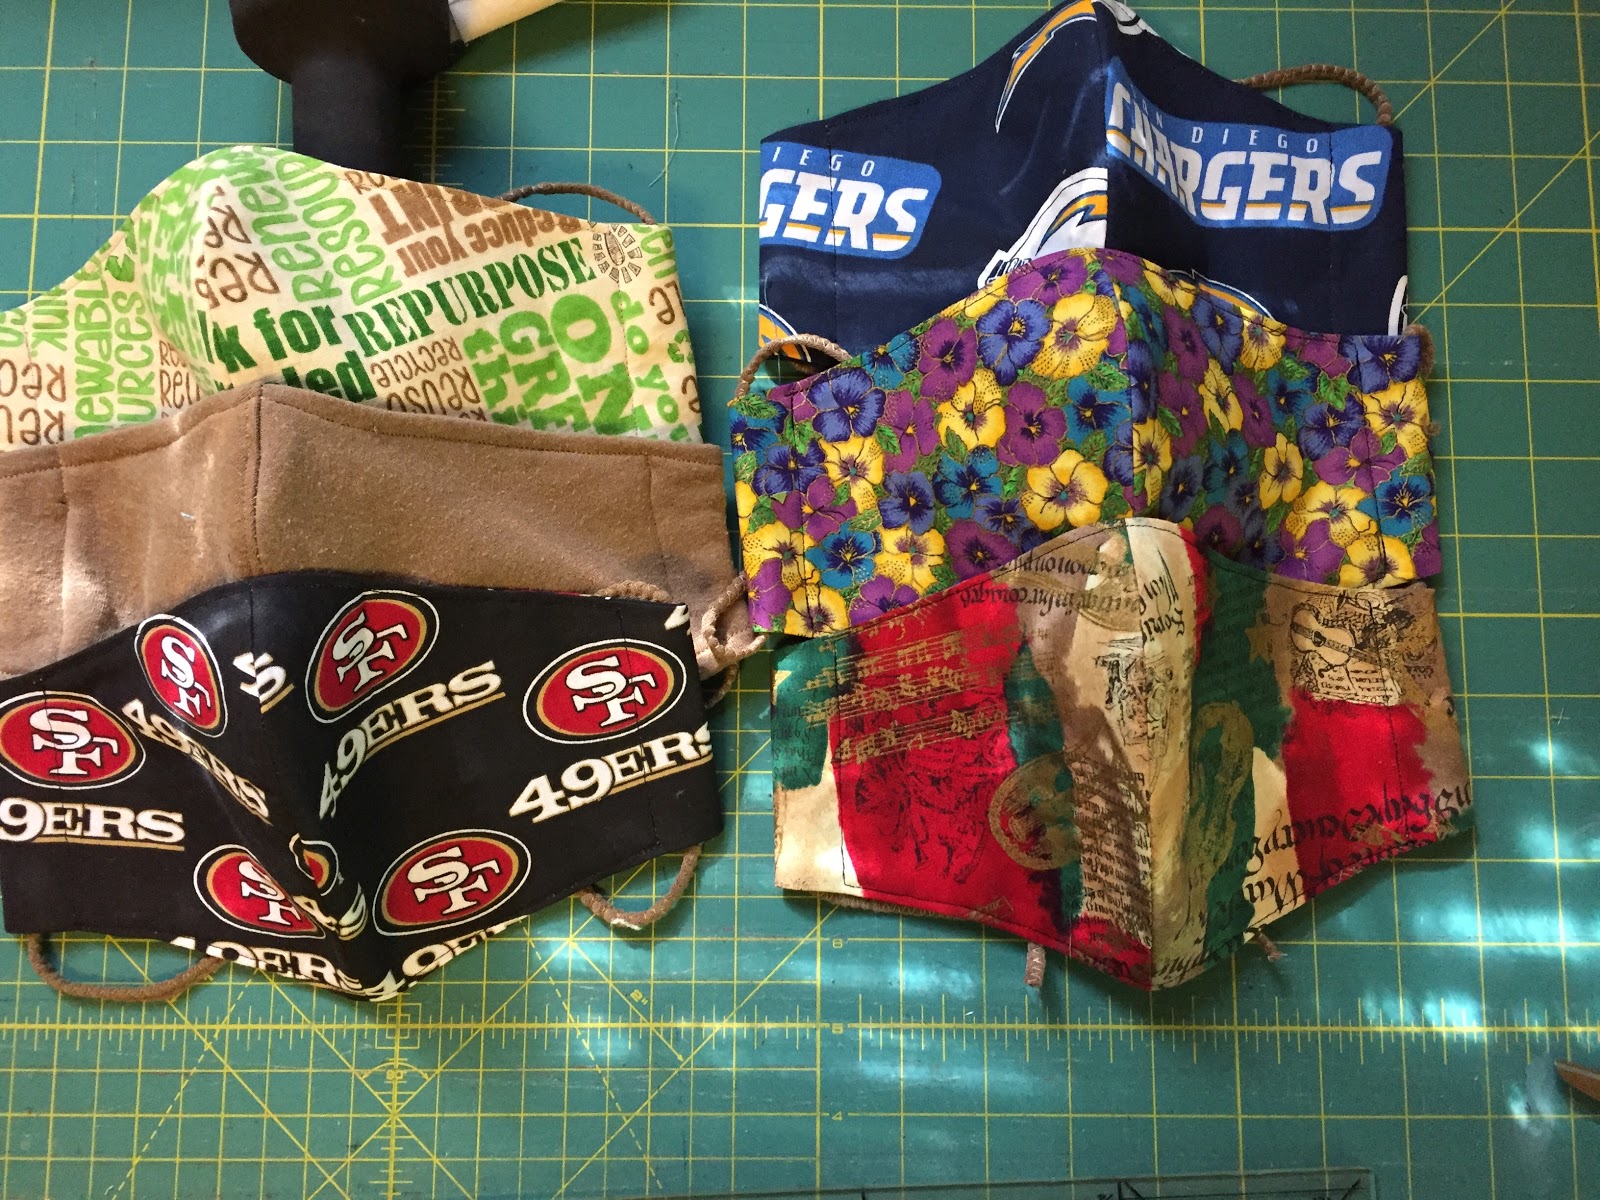
Like many others I have been making face masks.  I have used three different patterns -- the Rona Mask (only made one of these), a pleated face mask from Teresa Down Under, and the Olson Mask pattern (I like making this one the most).  Not sure which one wearers like the most.  So far mine have only gone to family, friends, and co-workers.  


Friday, March 8, 2019

Gym Bag

I recently made this gym bag. The green lining is an old army duffel bag that once belonged to my dad (he died when I was 8 yrs old).  I altered the pattern I used to make my yoga mat bag.  This bag is shorter (finished length approx 18 in, 8 in wide, 8 in high).  This one has two center zippered pockets and two mesh pockets on the inside.  I also added a strapped key hook.  My only regret is not making the straps a little longer.
 Mesh pocket with the key hook before I turned the bag right side out.


I used a label from a nephew's old jeans (it says made in America) to cover a badly frayed area of the lining fabric.


Friday, May 18, 2018

Bag for My Yoga Mat

Our local Lululemon hosts free yoga classes on Sunday morning.  I have been going to them since the beginning of this year (learning about them around Christmas).  I had been using a cheap (thin) mat I bought at Wal-Mart.  A couple of the girls who work there gave me one of theirs (new, 5 mm thick).  It is wonderful.  As it is heavier and nicer than my old one I felt I needed a bag to protect and carry it (although a carrying strap might have worked and I may yet make one).  I found a pattern at Annie's Bags (here's the link: http://www.byannie.com/yoga-bag).  Here's how it turned out.
 This side has three pockets, two with zippers.  The other side only has the middle pocket without a zipper.
 Both ends have non-zippered pockets.
As support for the store I have since purchased the same mat (different color) for one of my sisters.

Friday, March 2, 2018

Two Surgeon's Caps

Made these two surgeon's caps earlier this week. 


Friday, October 6, 2017

Cross Shoulder Purse

I made this cross shoulder purse after making this travel bag.  I used the same fabrics as I had so much left over.  I entered it into the 2018 Road to California Bag Challenge.  I don't expect to win but you never know.  I drafted the pattern for this purse using an old leather purse.  There are three outer pockets and three inside pockets.  The purse has a zipper closure.  The strap length can be adjusted for shoulder length or cross body.   This side has two slip pockets.
 I consider this the back.  There is one slip pocket on this side.
 The inside has three pockets, two open and one zips closed.
There is also a hook for keys on the end of the strap.  I have always loved this feature in my old purse so added it here.
T

Friday, September 8, 2017

Travel Bag

I was inspired to make this bag when I stumbled across the 2018 Road to California Bag Challenge.  I'm not sure the bag is special enough to win the contest so I'm still deciding if I will enter it.  Still I am happy with the bag.  It is something I will use.  I used the Ultimate Travel Bag pattern from Annie.com.  There is a pocket on each side of the bag.  The back has a slip pocket as well as a strap at the top to which allows the bag to be secured to the handles of rolling luggage. There is a padded adjustable and detachable carrying strap as well as side handles
 The front has two pockets, one a slip pocket and another with a zipper.
Inside there are mesh pockets on the front and back.  The bottom has a plexiglass bottom stabilizer under the fabric lining.  I sewed buttons on the outside bottom as suggested to reduce wear over time. 

Friday, March 17, 2017

More Dog Shirts for Lizzie

I've been making Lizzie shirts.  I've have used old and new (on sale at greatly reduced cost) shirts and recycled them into shirts for Lizzie.  The pattern is one I drafted using a purchased shirt and have tweaked as I made the shirts.   This pink one was made from a purchased child's shirt featuring the Wonder Woman logo.

 I love this camouflage shirt!  Also a purchased child's t-shirt recycled.

This blue one is recycled from a shirt my husband donated.  I should have cut it with a bit more ease as the fabric isn't as stretching as it at first appeared. It's a little difficult to get on/off so won't get used much.
 I do like the white strips though
 This red one sparkles in the sunlight.  It is from a purchased child's shirt.
 You can see a few sparkles in this photo.  They are really visible outdoors in the sunlight.
 This one is my favorite (followed by the camo one).  It is recycled from one of my old shirts.  It has a mock turtle neck.


Friday, February 10, 2017

Three More Dog Shirts

I recently bought a Husqvarna Huskylock s21 serger.  I've made three dog shirts (two from knit T-shirt fabric and one from an old flannel shirt) as part of learning to use the machine which is way more powerful, has more extra feet, and more stitches than the serger I had years ago (broke it making a bag for a niece, sewing through too many thicknesses).  I attempted to draft my own patterns.  This first one I drafted using an old Simplicity pattern #9520, dog patterns for large dogs like my old Labradors.  It's a little big.

The next two shirts I made using a pattern I drafted from a purchased shirt that fits Lizzy. 
 I think I need to raise the neckline in the front about an inch and use a 15 in neck band rather than 16 in band.
This one I made using the flannel shirt.  I choose to put the buttons along the back to facilitate putting it on Lizzie.  I took the collar/band unit apart and resewed it.  The collar was split in the middle with the once back collar sewn so that the button on the band ended up in the back.  The front of the collar was sew so it sits at the front of Lizzie's neck but at the back of the collar band. 
 The collar back was tapered from full width at the back to half width at the front of Lizzie's neck.  It could use a bit more ease so it doesn't gap/pull but otherwise fits nicely.

Friday, December 2, 2016

Shirts for my dog Lizzie

I drafted a pattern for a pullover shirt for my dog Lizzie.  I used these notes (http://www.barlowscientific.com/technotes/home/sweater.html) as a reference which are quite helpful.


Here's my first one using an old T-shirt with the words "dog rule" on the front.
 Lizzie approves.


I did a bit of tweaking to tighten and raise the neck a bit as well as tightening the torso a bit too for this one.  It was made of left over fleece.  I used sock cuffs for the sleeves as I didn't have quite enough fleece.  The socks worked really well.
I'm not sure if I'll leave the pattern alone now or tweak it more.


Friday, August 12, 2016

Office Chair Recovered

I recovered the office chair I use in my sewing room.  I am really please with how it turned out.

Friday, August 5, 2016

Sewing Room Remodel Done

The remodel of my sewing room is mostly done.  There are small things that still need to be done -- like recovering the chair, hanging pictures, etc -- but the floor it done, the walls are painted, the shelves are up, new blinds in place, and the books, fabric, etc have been put back into place.  Here are some photos of the after.
This first photo shows the wall with the closet that has been turned into a small office space with my antique desk as well as some built in shelves which hold yarn, books, etc.  There is a large peg board that hold gadgets, some thread, and my quilt templates. I have have a big board ironing board that fits over my regular ironing board.  It needs a new cover which I plan on ordering soon.
This photo shows the wall that faces west so this blind will be closed most of the time to help keep the room cool.  My sewing machine sits on an old dining table (it actually will fold out into a rectangle) that I've had since the mid-80's. I long ago took over one of my husband's draft tables to use as a cutting area and to help support my fabric and quilts as I sew/quilt. I discovered that several of my storage bins that stack fit nicely beneath it (easier to see in a photo below).
This photo is of the wall facing north.  The blinds will be mostly kept open.  There is a nice bookcase along this wall which holds quilting and knitting books.  There are also more storage bins of fabric.  My fabric hasn't been sorted by color.
This wall holds my design area made of white felt.  I made sure it was twice as large after the remodel as before.  I am enjoying the increased size already.
 Here is a photo that show the stacked bins under the cutting table.

Friday, July 22, 2016

Sewing Room Remodel In Progress

My sewing room has been long overdue for some remodeling.  The carpet and paint as you can see from these first two photos were old and dirty from living with dogs (got to love them) and time.  Besides it never seemed to be a good time to close the sewing machine and take the time but currently we are dog-less as our Rusty died this past January.  No more excuses.
In this second photo you can see the carpet (probably 25 plus years) was originally a pale blue.  Regardless of my cleaning it got to be impossible to get rid of the dirt stains.
 I have chosen a light golden yellow for the new paint.  The floor is a faux wood similar to Pergo and snaps in place.  My dear husband is fortunately a good handyman.  We duct-taped a beach towel over the west wall to block some of the summer sun out and help keep the room cool.

 The clothing closet has been turned into an area for my small antique writing desk with some shelves added for books, etc.